A persistent misfire in one cylinder that worsens under load, even when spark and fuel delivery are confirmed good, often points to a burnt valve. The valve face or seat has eroded enough that combustion gases leak past the closed valve during compression and power strokes. This leakage reduces cylinder pressure, produces a characteristic hissing sound through the intake or exhaust, and leaves burnt deposits around the damaged seat contact area. Burnt valve symptoms include rough idle, loss of power, poor fuel economy, elevated exhaust-gas temperature in that cylinder, and a steady misfire code for the affected cylinder.
Key Takeaways
- A burnt valve is a thermal and sealing failure where hot combustion gas erodes the valve face or seat, creating a leak path that reduces compression.
- Exhaust valves burn more frequently than intake valves because they operate at higher temperatures and rely entirely on seat contact for cooling.
- Cylinder-specific misfire codes, low compression in one cylinder, and a hissing leak during a leak-down test confirm a burnt valve before cylinder-head removal.
- Root causes include excessive valve-lash clearance, poor seat contact, inadequate cooling, lean air-fuel mixture, and carbon deposits that prevent full valve closure.
- Repair requires cylinder-head removal, valve and seat inspection, machining or replacement of damaged components, and correction of the underlying cause to prevent recurrence.
A Burnt Valve Is a Heat-and-Sealing Failure
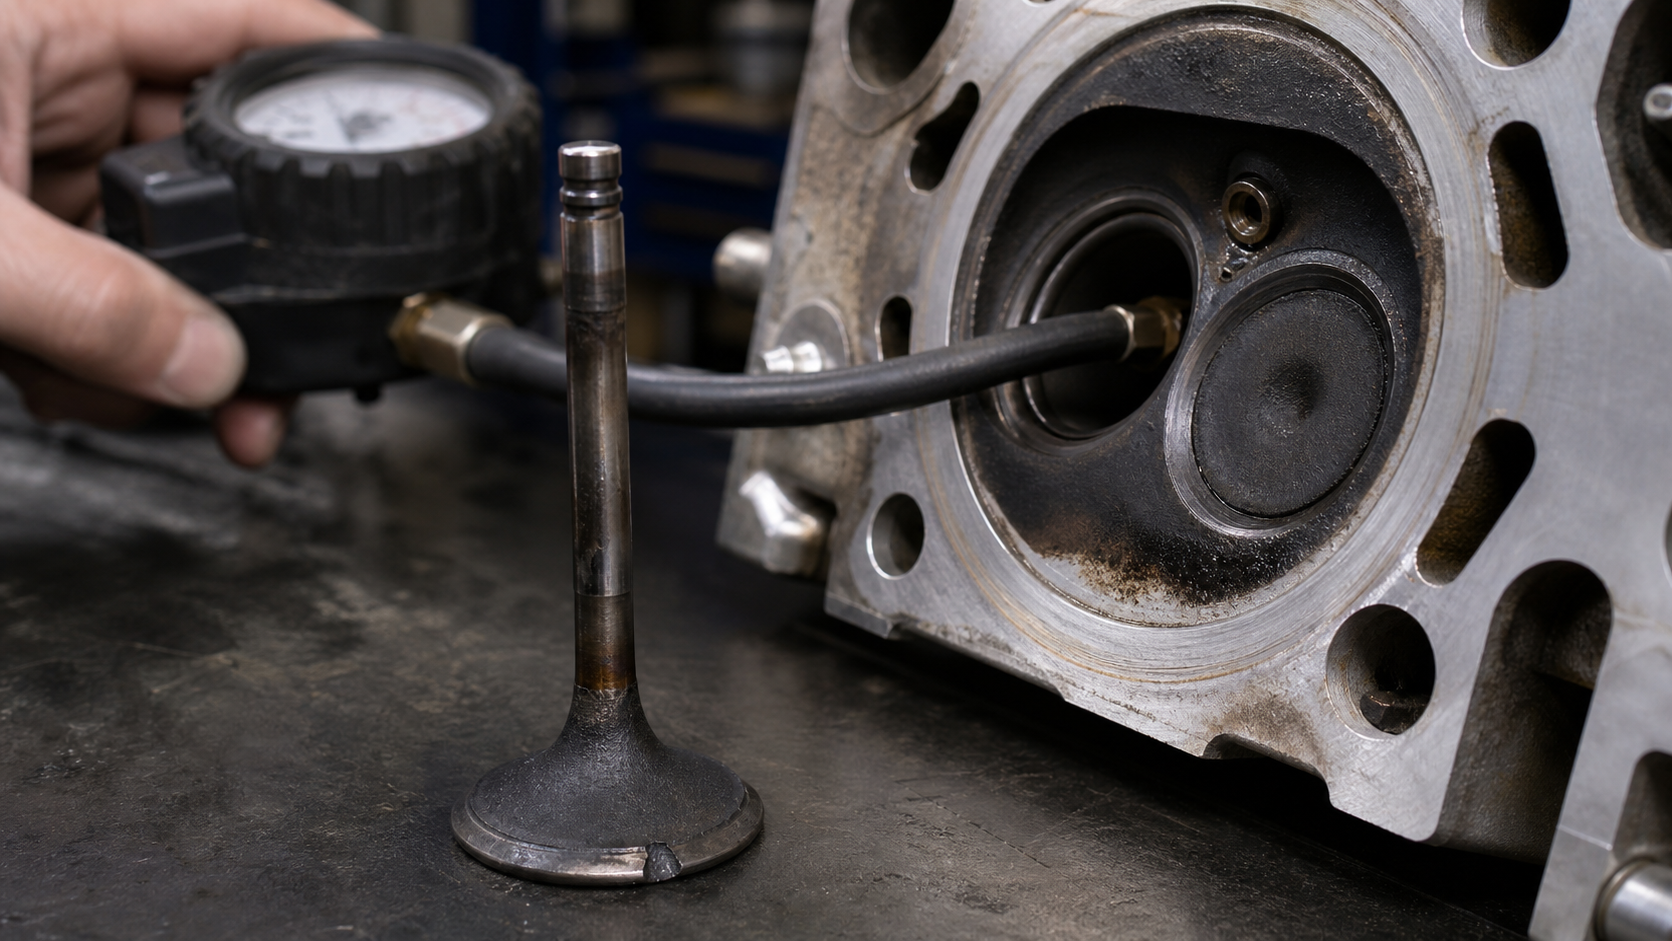
An engine valve must seal combustion pressure and transfer heat from the valve head through the seat into the cylinder head, which is cooled by circulating coolant. The valve face contacts the seat only when closed, and this metal-to-metal contact is the primary cooling path for the valve. If the valve does not seat fully or if deposits prevent complete closure, a small gap allows high-temperature combustion gas to escape during compression and power strokes. This high-velocity gas jet erodes the valve face and seat material, enlarging the leak and raising the valve temperature further. The hotter valve expands more, seats less reliably, and loses tensile strength in the affected region. Once started, the erosion process accelerates until the valve face shows visible burning, pitting, or a wedge-shaped notch where gas escapes.
Exhaust valves operate at higher temperatures than intake valves because they remain open during the exhaust stroke when hot gas flows past them. Intake valves benefit from cooling by incoming air or air-fuel mixture during the intake stroke. The exhaust valve relies almost entirely on seat contact and stem-to-guide heat transfer to stay within safe operating temperature. Any factor that disrupts seat contact or reduces heat transfer makes the exhaust valve vulnerable to thermal damage.
Typical Symptoms and Cylinder-Specific Clues
A burnt valve typically produces a steady misfire in one cylinder rather than an intermittent or rotating misfire pattern. The scan tool will show a consistent misfire count for the affected cylinder across multiple drive cycles. Unlike ignition or fuel-injector faults that may appear randomly or improve when components warm up, a burnt valve creates a permanent compression loss that becomes more noticeable under load. Acceleration feels weak, and the engine may stumble or hesitate when climbing grades or merging into traffic. At idle, the engine runs rough and may shake more than usual, but the misfire becomes more pronounced when manifold vacuum drops and cylinder pressure rises during power demand.
Exhaust-gas temperature monitoring, if available, may show an elevated reading for the affected cylinder because unburned fuel exits during the exhaust stroke. The exhaust note may include a rhythmic hissing or puffing sound as combustion gas leaks through the valve during compression. A dead-cylinder check—disabling one injector or spark plug at a time—will show little or no change in idle quality when the burnt-valve cylinder is disabled, because it was already contributing minimal power.
Fuel economy drops because the engine control module increases fuel delivery to compensate for the weak cylinder, but the extra fuel cannot restore compression. The vehicle may also fail an emissions test due to elevated hydrocarbons from incomplete combustion in the affected cylinder.
Why Exhaust Valves Burn More Often
Exhaust valves account for the majority of burnt-valve failures because they operate in a harsher thermal environment than intake valves. During the exhaust stroke, hot combustion byproducts flow directly over the exhaust valve face. The valve head temperature in a typical gasoline engine can exceed the intake valve temperature by several hundred degrees. Intake valves see incoming air or mixture at near-ambient temperature during the intake stroke, which provides continuous convective cooling.
The exhaust valve’s cooling path is limited to conduction through the valve seat when closed and through the valve stem and guide. If the valve does not close fully or if a carbon deposit lifts it off the seat, the cooling path is interrupted. Sodium-filled exhaust valves, used in some high-performance and diesel engines, improve heat transfer along the stem, but the seat contact remains the dominant cooling mechanism.
Material selection also plays a role. Exhaust valves are typically made from heat-resistant alloys such as 21-4N stainless steel or Inconel, while intake valves use lower-cost materials. Even with superior alloys, exhaust valves operate closer to their material temperature limits, leaving less margin for error when cooling is compromised.
Clearance, Seat Contact, Cooling, Mixture, and Deposit Causes
Excessive Valve-Lash Clearance: In engines with mechanical valve adjustment, excessive clearance between the camshaft lobe and the valve stem reduces the time the valve remains fully seated. The valve opens late and closes early, shortening the dwell period when heat can transfer to the seat. Over time, this reduces cooling effectiveness and increases valve temperature. Hydraulic lifters compensate for wear automatically, but if a lifter fails or loses oil pressure, the same clearance problem occurs.
Poor Seat Contact: The valve seat must be concentric with the valve guide and machined to the correct width and angle. A seat that is too narrow or off-center creates a small contact area, concentrating heat transfer into a limited zone and raising peak temperatures. A seat that is too wide can trap carbon particles, preventing full valve closure. Valve grinding or seat machining during previous repairs can introduce errors if not performed to the engine manufacturer’s specifications.
Inadequate Cooling: Restricted coolant flow through the cylinder head, a failing water pump, a stuck thermostat, or air pockets in the cooling system raise cylinder-head temperature and reduce the seat’s ability to absorb heat from the valve. Overheating episodes from other causes—such as a blown head gasket or radiator failure—can initiate valve damage that continues even after the cooling system is repaired.
Lean Air-Fuel Mixture: A lean mixture burns hotter than a stoichiometric mixture, raising combustion temperature and exhaust-gas temperature. Causes include vacuum leaks, faulty mass-airflow or oxygen sensors, clogged fuel injectors, or low fuel pressure. Prolonged operation with a lean condition increases valve temperature and accelerates erosion once a small leak forms.
Carbon Deposits: Carbon buildup on the valve face or seat prevents the valve from seating fully. Even a thin layer of deposit can hold the valve open by a fraction of a millimeter, creating a leak path for combustion gas. Deposits accumulate from incomplete combustion, oil consumption past worn valve seals or rings, or low-quality fuel. Engines with direct fuel injection are more prone to intake-valve deposits because fuel does not wash over the valve face, but exhaust valves accumulate deposits from combustion byproducts regardless of injection type.
Compression and Leak-Down Diagnosis
A compression test is the first step in confirming a burnt valve. Connect a compression gauge to the spark-plug hole, disable the ignition and fuel systems, and crank the engine while holding the throttle wide open. Record the peak pressure in each cylinder. A burnt valve produces low compression in one cylinder, typically well below the specification or significantly lower than neighboring cylinders. For example, if three cylinders read within specification and one reads substantially lower, the weak cylinder is suspect. Unlike a worn piston ring, which shows gradual pressure increase as multiple compression strokes allow oil to seal the rings, a burnt valve produces low readings that do not improve with repeated cranking or after adding oil to the cylinder.
A cylinder leak-down test isolates the leak path. With the piston at top dead center on the compression stroke, apply regulated compressed air to the cylinder through the spark-plug hole and measure how much pressure escapes. A healthy cylinder retains most of the applied pressure. A burnt valve allows significant leakage, and the escaping air produces a distinct hissing sound through the intake manifold or exhaust pipe, depending on which valve is burnt. An exhaust-valve leak hisses through the tailpipe; an intake-valve leak hisses through the throttle body or intake manifold. Leakage past the rings hisses through the oil-filler cap or crankcase breather, and a head-gasket leak creates bubbles in the cooling system or hisses between cylinders.
A running compression test or cylinder-pressure waveform analysis, captured with a lab scope and pressure transducer, shows the pressure trace during engine operation. A burnt valve creates a characteristic pressure drop during the compression stroke as gas leaks past the valve. This differs from the waveform of a worn ring, which shows gradual pressure loss throughout the cycle, or a timing issue, which shifts the peak pressure point.
A borescope inspection through the spark-plug hole can reveal visible damage to the valve face if the valve is open during inspection. However, a burnt exhaust valve may not be visible when the valve is closed, so borescope findings are supplementary rather than conclusive.
Cylinder-Head Inspection after Removal
Once the cylinder head is removed, a burnt valve is immediately visible. The valve face shows erosion, pitting, or a notch where combustion gas has cut through the material. The seat in the cylinder head may also show a corresponding groove or discoloration. The burnt area typically appears on the exhaust valve, though intake valves can burn if deposits or timing issues cause prolonged high temperatures.
Inspect the valve seat in the head for width, concentricity, and surface condition. Use a seat-width gauge or dial indicator to check that the seat is centered on the valve guide. The seat width should match the engine manufacturer’s specification. A seat that is too wide or too narrow, or that shows uneven contact around its circumference, must be re-machined or replaced.
Check valve-stem-to-guide clearance with a dial gauge or by measuring the stem diameter and guide inside diameter with a micrometer. Excessive clearance allows the valve to wobble, creating uneven seat contact and accelerating wear. Replace the guide if clearance exceeds the service limit.
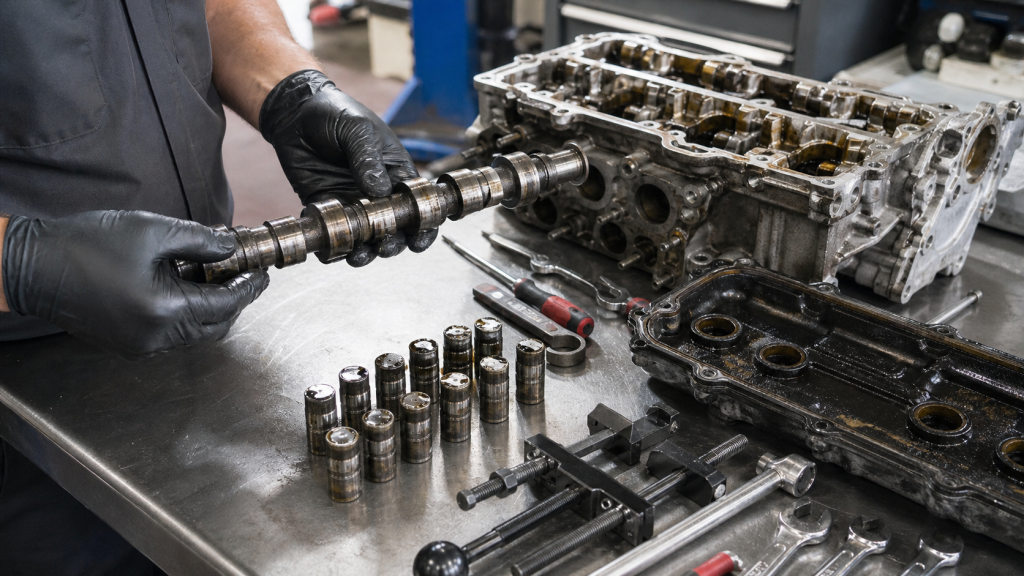
Measure valve length and stem wear. A valve that has been ground multiple times during previous repairs may be too short to achieve correct installed height and spring pressure. Measure the valve spring free length, installed height, and pressure with a spring tester. Weak springs reduce seating force and allow the valve to bounce, disrupting seat contact.
Inspect for cracks between the valve seats, between the seat and a spark-plug hole, or around coolant passages. Cracks indicate overheating or casting defects and may require cylinder-head replacement.
Repair Scope beyond One Valve
Replacing only the burnt valve without addressing the root cause will result in a repeat failure. If valve-lash clearance was excessive, adjust all valves to specification and inspect the camshaft lobes and rocker arms for wear. If deposits caused the failure, clean all valve seats and faces, inspect valve seals and piston rings for oil consumption, and consider fuel-system cleaning or a switch to a higher-quality fuel.
If the seat was damaged, machine the seat to restore the correct angle and width, then lap the new valve to the seat to ensure full contact. Some cylinder heads use replaceable seat inserts, which can be removed and replaced if erosion is severe. After machining, measure installed valve height and spring pressure to confirm they remain within specification.
Inspect all valves and seats in the head, not just the burnt one. If one exhaust valve has burnt, neighboring exhaust valves may show early signs of erosion or deposit buildup. Replace all exhaust valves and springs as a set if the engine has high mileage or if multiple valves show wear.
Check for cooling-system issues such as restricted passages, a failing water pump, or air pockets that could have contributed to overheating. Perform a cooling-system pressure test and inspect the thermostat operation. If a lean mixture was the cause, diagnose and repair the fuel or air-induction fault before reassembling the engine.
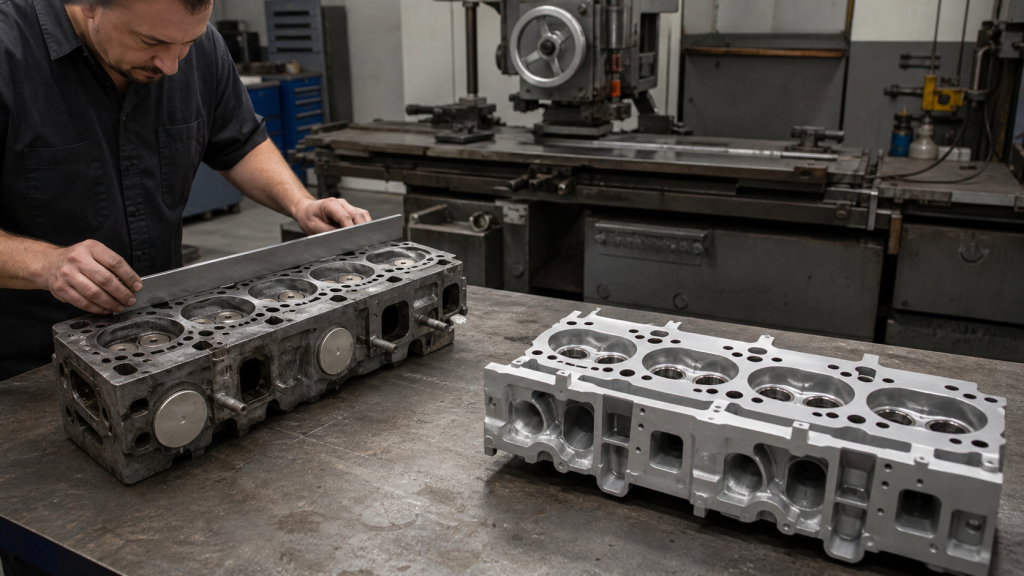
Resurface the cylinder-head mating surface if it is warped or damaged. Use a precision straightedge and feeler gauges to check flatness. The allowable warpage limit varies by engine; consult the service manual for the specific value. Resurfacing removes material and may require thicker head gaskets or modified timing to maintain proper piston-to-valve clearance.
FAQs
Can You Drive with a Burnt Valve?
Driving with a burnt valve causes further damage to the valve seat, increases fuel consumption, raises emissions, and risks misfires that can damage the catalytic converter. The affected cylinder produces little power, forcing the remaining cylinders to work harder and accelerating wear. Continued operation with a severe leak can also overheat the cylinder head and cause cracks. Limit driving to what is necessary to reach a repair facility.
How Long Does It Take for a Burnt Valve to Fail Completely?
The rate of progression depends on the severity of the initial leak, engine load, and operating temperature. A small leak can enlarge over hundreds of miles as erosion accelerates. Heavy loads, sustained high speed, and towing accelerate the process. Once the valve face shows visible damage during inspection, the valve should be replaced immediately. Ignoring the fault can result in valve breakage, with fragments dropping into the cylinder and causing catastrophic damage to the piston, rings, and cylinder wall.
Do Intake Valves Burn as Often as Exhaust Valves?
Intake valves burn far less frequently than exhaust valves because they operate at lower temperatures and benefit from cooling by incoming air or mixture. However, intake valves can burn if deposits prevent closure, if valve-lash clearance is excessive, or if a timing fault causes backfiring through the intake manifold. Carbon buildup on intake valves in direct-injection engines increases the risk of sealing problems but does not typically cause the same thermal erosion seen on exhaust valves unless combined with other faults.
What Is the Difference between a Burnt Valve and a Cracked Valve?
A burnt valve shows erosion, pitting, or a notch on the sealing face caused by hot combustion gas cutting through the material. A cracked valve shows a fracture line through the valve head, margin, or stem, typically caused by mechanical stress, material fatigue, or impact from foreign-object ingestion. A burnt valve leaks gas continuously and reduces compression; a cracked valve may break completely, dropping fragments into the cylinder. Both require valve replacement, but a cracked valve often results from over-revving, valve float, or interference with the piston, while a burnt valve results from thermal and sealing problems.
Can a Burnt Valve Be Repaired without Removing the Cylinder Head?
No. A burnt valve requires cylinder-head removal to replace the damaged valve and machine the seat. In-cylinder chemical treatments or seal conditioners cannot restore a valve face that has eroded or a seat that has been cut by hot gas. Attempting to operate the engine with a burnt valve will only enlarge the leak and increase repair costs. Some engines allow cylinder-head removal without removing the engine from the vehicle, reducing labor time, but the head must still come off for proper inspection, machining, and valve replacement.
Conclusion
A burnt valve creates a persistent single-cylinder misfire that worsens under load, confirmed by low compression and a hissing leak during a leak-down test pointing to the intake or exhaust tract. Once diagnosed, document the cylinder number, compression reading, leak-down percentage, and any visible damage through the spark-plug hole. Request a detailed quote that includes cylinder-head removal, valve and seat inspection, machining or replacement of damaged components, valve-lash adjustment, and correction of the root cause—whether excessive clearance, cooling-system faults, lean mixture, or deposit buildup. Compare quotes from shops experienced with your engine family, and confirm that the scope includes resurfacing the head mating surface, checking valve spring pressure, and verifying installed valve height after repair. For sourcing replacement valves, cylinder heads, or related engine components, verify material specifications, heat-treatment details, and dimensional compliance with the original-equipment service manual to ensure proper fit and durability.