Milky oil, persistent coolant loss, and rising temperature point to internal leakage, but the leak may pass through the head gasket, cylinder head, or block. A true block crack requires measured confirmation through cooling-system pressure tests, combustion-gas detection, compression testing, leak-down testing, and direct inspection after disassembly. This guide maps each symptom to its leak path, explains what causes an engine block to crack, and outlines the testing sequence that separates block damage from head or gasket faults before committing to repair or replacement.
Key Takeaways
- External leaks below the head-gasket line suggest block damage, but internal mixing and compression loss require pressure, combustion-gas, and leak-down tests to isolate the fault.
- Freeze damage, sustained overheating, severe detonation, casting defects, and mechanical stress from bearing or crankshaft failures cause block cracks.
- Cooling-system pressure tests and block testers detect combustion-gas intrusion; compression and leak-down tests reveal where pressure escapes and whether the head, gasket, or block is responsible.
- Running an engine with confirmed coolant-to-oil mixing or combustion leakage damages bearings, scores cylinder walls, and contaminates lubrication, expanding repair scope.
- Repair decisions depend on crack location, leak path, material type, bore condition, main-bearing alignment, and whether the machine shop has approved methods for that engine family.
Symptoms Suggest a Leak Path, Not Yet a Crack Location
Every cracked engine block symptom reflects a leak between two systems—coolant-to-combustion, coolant-to-oil, oil-to-coolant, or coolant-to-atmosphere—but the same path can pass through the head gasket, cylinder head, or block. The diagnostic problem is identifying which component contains the breach.
Symptom-to-Leak-Path Matrix:
|
Symptom |
Possible Leak Paths |
Distinguishing Tests |
|---|---|---|
|
Milky oil in crankcase |
Head gasket breach (coolant passage to oil gallery), head crack (coolant jacket to valve-cover drain), block crack (water jacket to oil gallery) |
Leak-down test with crankcase observation, post-disassembly inspection |
|
Coolant loss without external leaks |
Head gasket breach (cylinder to coolant passage), head crack (combustion chamber to coolant jacket), block crack (bore to water jacket) |
Block tester for combustion gases, leak-down test with coolant observation |
|
Overheating |
Combustion-gas pressurization (any combustion-to-coolant path), circulation blockage |
Cooling-system pressure test, block tester |
|
Compression loss |
Head gasket breach between adjacent cylinders, head crack, block crack, piston damage |
Compression test, leak-down test by cylinder |
|
External coolant leak |
Block crack below deck surface, freeze-plug failure, core passage crack, head-gasket migration from internal crack |
Pressure test with visual observation, dye testing |
Milky oil appears when coolant enters the crankcase. This condition results from a head-gasket failure between a coolant passage and an oil-return gallery, a head crack connecting a coolant jacket to a valve-cover drain, or a block crack linking a water jacket to an oil gallery. Coolant loss without visible external leaks indicates internal consumption into the combustion chamber or oil system. Overheating results when coolant circulation is interrupted or when combustion gases pressurize the cooling system faster than the radiator cap can vent.
Multiple simultaneous failures compound diagnosis. A severely overheated engine may crack both the head and block, creating overlapping symptoms that only sequential pressure and leak-down testing can separate. An engine with a failed head gasket and a block crack in different cylinders will show uneven compression, requiring cylinder-by-cylinder leak-down tests to identify which leak belongs to which failure.
External Coolant or Oil Leaks
External leaks visible on the block casting below the head-gasket line or behind the front cover provide stronger evidence of block damage than internal symptoms. Coolant weeping from the block deck near a cylinder bore, dripping from a freeze-plug boss, or running down the block below the head-gasket surface indicates a crack in the water jacket or a core-plug passage. Oil seeping from the block casting rather than a gasket joint suggests a crack connecting an oil gallery to the outside.
Cast-iron blocks often develop hairline cracks between adjacent cylinder bores or between a bore and the nearest water-jacket core. These cracks may remain dry during cold operation and only open under thermal expansion at operating temperature, producing intermittent leaks that stop when the engine cools. Aluminum blocks crack more visibly due to lower ductility and higher thermal expansion, with cracks typically propagating from bolt holes, sharp casting transitions, or thin sections between water passages and cylinder bores. Freeze damage creates casting fractures that may not align with gasket surfaces, producing leaks that do not match the head-gasket bolt pattern.
Distinguishing block leaks from head-gasket leaks requires cleaning external surfaces, pressurizing the cooling system with the engine cold, and observing where fluid first appears. A leak emerging from the head-gasket joint may still originate in the block if the crack connects to a coolant passage near the deck surface, allowing coolant to migrate along the gasket before becoming visible. Dye testing under ultraviolet light traces the leak origin.
Internal Mixing, Combustion Leakage, and Compression Changes
Internal coolant-to-oil mixing produces milky oil in the valve cover, on the dipstick, and at the oil-filler cap. The emulsion forms when coolant pressure exceeds oil pressure and forces coolant into the lubrication system. In most engines, coolant pressure is higher than oil pressure during cold starts and warm-up, creating a pressure gradient that drives mixing if a leak path exists. A block crack connecting a water jacket to an oil gallery will allow this mixing, but so will a head crack, a head-gasket breach, an intake-manifold gasket failure on engines with coolant passages in the manifold, or an oil-cooler rupture.
Combustion-gas leakage into the cooling system pressurizes the system beyond the radiator cap’s relief setting, causing coolant overflow, air pockets in the heater core, and localized boiling near the leak site. A block tester—a fluid that changes color in the presence of combustion byproducts—detects hydrocarbons or carbon dioxide in the coolant expansion tank. This test confirms a combustion-to-coolant leak but does not distinguish between block, head, and gasket sources. Head-gasket failure between a cylinder and a coolant passage is the most common source, followed by cylinder-head cracks in the combustion-chamber deck or valve-seat area.
Compression loss and cylinder-pressure imbalance appear when a crack connects a combustion chamber to a coolant or oil passage, allowing compression pressure to escape. Compression testing measures peak pressure in each cylinder, revealing which cylinders are affected. Leak-down testing pressurizes each cylinder with the piston at top dead center and measures how much air escapes, then identifies where the air goes—into the cooling system, crankcase, exhaust, or intake. Air bubbling into the coolant during a leak-down test confirms a combustion-to-coolant path, while air escaping into the crankcase suggests a crack below the piston rings or a failed ring-land. Leak-down results combined with borescope inspection of the combustion chamber and cylinder walls narrow the fault to the block, head, or piston.
Freeze Damage, Overheating, Detonation, Casting Defects, and Mechanical Stress
Understanding what causes an engine block to crack helps predict where cracks form and whether other components are also damaged.
Freeze damage occurs when coolant freezes inside the block, expanding and fracturing the casting. Cracks from freeze damage typically run between cylinder bores or from a bore to the nearest freeze plug, following the path of least resistance in the water jacket. Aluminum blocks are more vulnerable because aluminum’s higher thermal expansion creates greater stress during the freeze-thaw cycle.
Sustained overheating weakens the casting by exceeding the material’s creep-resistance temperature, allowing thermal stress to open cracks at stress concentrations. Overheating damage usually appears near the top of the cylinder bores where combustion temperatures are highest, often between the head-gasket fire ring and the deck surface. Repeated overheating cycles produce progressive crack growth, starting as a surface check and deepening with each thermal cycle until the crack penetrates the water jacket.
Severe detonation generates shock loads that exceed the block’s fatigue strength, particularly in thin-wall performance castings or engines running high boost pressure. Detonation cracks typically form at the thrust side of the cylinder bore where piston side-loading is greatest, or at the main-bearing webs where crankshaft loads concentrate.
Casting defects—porosity, sand inclusions, or shrinkage voids—create stress risers that initiate cracks under normal operating loads. These defects may remain dormant for the engine’s entire service life or may propagate rapidly when additional stress is applied.
Mechanical stress from main-bearing failure, connecting-rod breakage, or crankshaft fracture can crack the block from the inside out. A spun main bearing generates friction heat and impact loading that fractures the main-bearing saddle, while a broken connecting rod strikes the cylinder wall and cracks the bore. These failures produce catastrophic damage that typically writes off the block regardless of crack repairability.
Tests That Separate Block Cracks from Head-Gasket or Head Damage
Accurate diagnosis requires a testing sequence that progressively narrows the fault location.
1. Cooling-System Pressure Testing
With the engine cold, attach a pressure tester to the radiator or expansion-tank neck, pump the system to the radiator cap’s rated pressure, and monitor pressure hold over fifteen minutes. Pressure loss indicates a leak but does not reveal whether the leak is external, internal, or in which component. Observe where coolant appears during the test to localize external leaks. Pressure rise after initial stabilization, particularly if the engine is then started and idled, suggests combustion-gas intrusion.
2. Block Testing (Combustion-Gas Detection)
Use a combustion-gas detector fluid in the expansion tank to confirm whether combustion byproducts are entering the cooling system. Draw vapor from the expansion tank through the test fluid while the engine idles. A color change from blue to yellow or green indicates the presence of hydrocarbons or carbon dioxide, proving a combustion-to-coolant leak path. This test does not identify the leak location, only that combustion gases are present.
3. Compression Testing
Remove all spark plugs or fuel injectors, disable the ignition, and crank the engine while recording the highest gauge reading for each cylinder. Compare readings across cylinders and against the service manual’s specification. Low compression in one or two adjacent cylinders suggests a head-gasket leak between those bores or a localized head or block crack. Low compression across all cylinders indicates worn piston rings or valve sealing, not a block crack.
4. Leak-Down Testing
Pressurize each cylinder to 100 psi with the piston at top dead center on the compression stroke, then measure the percentage of pressure lost and identify where the air escapes. Listen at the oil filler for air entering the crankcase (rings or crack below the ring land), at the throttle body for air entering the intake (intake valve), at the tailpipe for air entering the exhaust (exhaust valve), and at the radiator neck for air bubbling into the coolant (head gasket, head crack, or block crack). A cylinder showing significant leak-down with bubbles in the coolant and no audible leakage at the crankcase, intake, or exhaust isolates the fault to a combustion-to-coolant breach in the head gasket, head, or block deck.
5. Visual Inspection After Disassembly
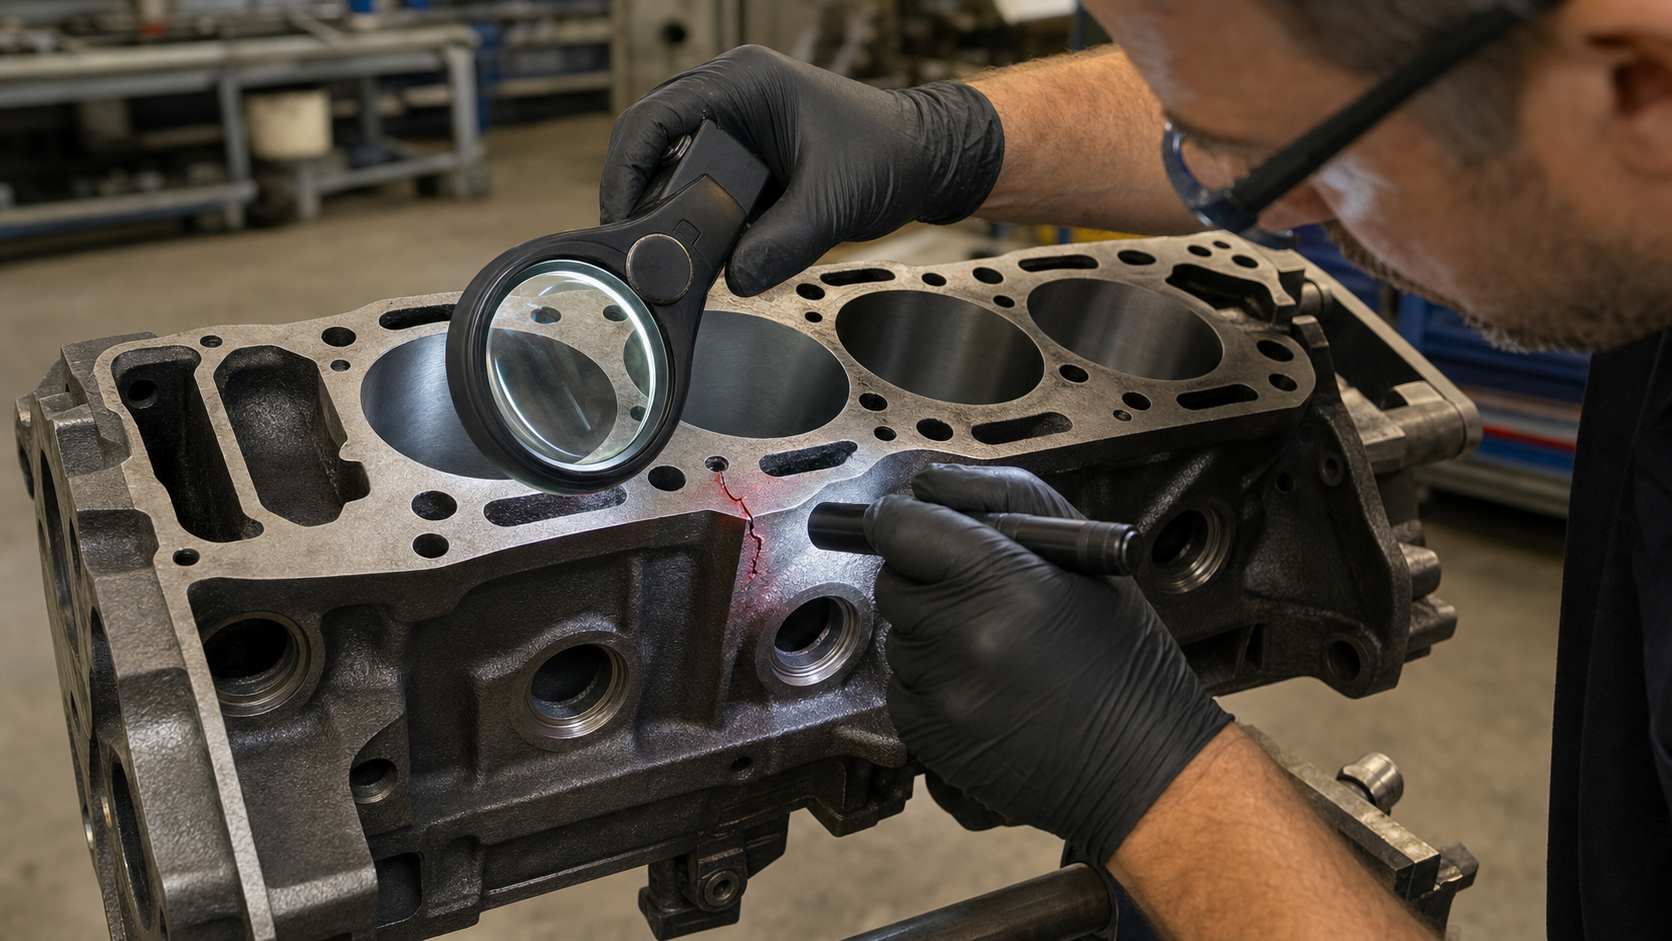
Remove the cylinder head and clean the block deck and combustion-chamber surfaces. Inspect the deck for cracks between bores, radiating from bolt holes, or extending into water passages. Dye-penetrant testing reveals hairline cracks not visible to the naked eye. Magnetic-particle inspection on cast-iron blocks detects subsurface cracks. Pressure-testing the bare block with water or compressed air while observing for leaks verifies whether a suspected crack penetrates fully or remains a surface check.
When to Stop Running the Engine
Once testing confirms internal coolant-to-oil mixing or combustion leakage, continuing to operate the engine accelerates secondary damage. Coolant contamination in the oil reduces lubrication viscosity and load capacity, causing bearing wear, camshaft scoring, and piston-ring scuffing. Combustion gases pressurizing the cooling system prevent normal coolant circulation, creating hot spots that warp the cylinder head, damage the head gasket further, and overheat pistons.
The decision point is whether the engine still produces acceptable power and whether the leak is stable or worsening. A slow external coolant leak from a block crack may remain stable for weeks, allowing time to arrange repair or replacement. A combustion-to-coolant leak that rapidly empties the overflow tank and produces white exhaust smoke demands immediate shutdown to prevent head warping. Milky oil that appears suddenly after a thermal event requires immediate oil and filter changes and shutdown until diagnosis is complete, as bearing damage progresses quickly once coolant enters the lubrication system.
For field diagnosis without shop access, stop driving as soon as coolant loss becomes persistent or oil appearance changes. Continuing to drive risks transforming a single-component failure into complete-engine replacement.
Preserve Evidence for the Repair Decision
The repair-or-replace decision depends on crack location, leak path, material type, bore condition, main-bearing bore alignment, machine-shop capability, and replacement-assembly availability. A small external crack in a cast-iron block’s water jacket, away from combustion chambers and machined surfaces, may be repairable by pinning or cold-stitch methods if a qualified shop has the equipment and the block’s remaining structure is sound. A crack that penetrates a cylinder bore or crosses the head-gasket sealing surface usually writes off the block, as repair methods cannot restore the original sealing surface or bore geometry.
Aluminum blocks are more difficult to repair due to lower ductility and the risk of crack propagation during welding. Welding aluminum blocks requires preheating, controlled cooling, and post-weld stress relief to prevent new cracks from thermal gradients. Many machine shops will not accept aluminum-block welding liability, leaving replacement as the only option.
Before disassembly, document all symptoms, test results, and measurements. Photograph leak locations, record compression and leak-down data by cylinder, and save cooling-system pressure-test results. This evidence supports warranty claims, helps the machine shop assess repairability, and provides baseline data for the replacement assembly’s break-in inspection.
When requesting repair quotes, specify whether the quote includes block inspection, crack repair, bore measurement, deck resurfacing, main-bearing bore alignment checks, and pressure testing, or only the crack-repair operation itself. For engines with available remanufactured short blocks or long blocks, compare the cost of crack repair plus head work, gaskets, and reassembly labor against the replacement-assembly cost.
When sourcing replacement blocks, verify that the casting number matches the original application, as minor casting revisions can affect head-bolt hole depth, coolant-passage alignment, and accessory-mounting bosses. Cross-reference the casting number through the engine manufacturer’s service information or a reputable parts supplier to confirm fitment before ordering.
FAQs
Can a cracked engine block be temporarily sealed with stop-leak products?
Stop-leak products deposit particulate or chemical sealants at leak sites and are designed for radiators, heater cores, and head gaskets. They do not reliably seal block cracks, especially cracks that open under thermal expansion or involve combustion pressure. A crack that cycles open and closed with temperature changes will expel the sealant during the expansion phase, and combustion-gas pressure exceeds the sealant’s bonding strength. Stop-leak products also risk clogging radiator tubes, heater cores, and coolant passages, creating overheating. If a block crack is confirmed, shut down the engine and proceed with repair or replacement.
How do you distinguish a block crack from a cylinder-head crack during diagnosis?
Leak-down testing provides the clearest distinction. Perform leak-down tests on all cylinders and record where air escapes. If air bubbles into the coolant system from one or two adjacent cylinders but other cylinders show normal leak-down with no coolant intrusion, the crack is likely in the head gasket or the head casting between those cylinders. If multiple non-adjacent cylinders show coolant intrusion, the block is more likely, as a single head crack rarely affects widely separated bores. After removing the head, inspect both the head deck and block deck for visible cracks. Dye-penetrant testing on both surfaces reveals hairline cracks missed during visual inspection. Pressure-testing the head and block separately confirms which component is cracked.
Does engine-block material affect crack repair options?
Cast-iron blocks tolerate cold-stitch pinning and certain welding processes because cast iron’s ductility and thermal properties allow localized repair without propagating new cracks. Qualified machine shops use tapered pins installed across the crack to stabilize it, then seal the crack with epoxy. Aluminum blocks are more brittle and sensitive to thermal gradients, making welding risky. Aluminum welding requires specialized equipment, preheating, and stress relief, and many shops will not accept the liability. For aluminum blocks, replacement is often the only practical option unless the crack is very small and external. Consult the machine shop’s capability and warranty terms before deciding on repair.
Can you drive with a minor external block crack that only leaks when hot?
Driving with any confirmed coolant leak risks progressive overheating, coolant-system contamination, and expansion of the crack. A crack that leaks only at operating temperature will worsen with each thermal cycle, eventually becoming a constant leak or progressing into a combustion chamber or oil gallery. The risk is unfavorable: continuing to drive may save a few days of downtime, but it increases the likelihood of head warping, bearing damage, or complete cooling-system failure. Stop driving, arrange alternative transportation, and schedule repair or replacement immediately.
What documentation should you request when buying a replacement engine block?
Request the casting number, machining history, bore measurements, deck-surface flatness measurement, main-bearing bore alignment report, and pressure-test results. For remanufactured blocks, ask for the reconditioning steps performed—bore honing, deck resurfacing, main-bearing bore line-boring if needed, and cylinder-wall thickness measurements. Verify that the block’s freeze-plug holes, oil-gallery passages, and coolant passages match the original application. If sourcing a used block, ask for the engine’s mileage, service history, and reason for removal. Confirm that the seller will accept a return if the block fails pressure testing or if the casting number does not match after delivery.
Conclusion
Cracked engine block symptoms—milky oil, coolant loss, overheating, and compression changes—do not confirm a block crack until testing isolates the leak path. Use the symptom-to-leak-path matrix to guide your diagnostic sequence: cooling-system pressure tests, block testers, compression tests, and leak-down tests separate block cracks from head-gasket and cylinder-head failures. Document test results, photograph leak locations, and record compression data before disassembly. When evaluating repair versus replacement, obtain quotes that specify crack-repair method, machining scope, and warranty terms, and compare those costs against remanufactured assemblies. For sourcing replacement blocks, verify casting numbers against the engine manufacturer’s service information and request bore measurements, deck flatness, and pressure-test documentation to ensure fitment and reliability.